When my mother was a little girl she used to visit family in Wauregan, CT which is part of the Town of Plainfield. She had very happy memories of going to one-armed Joe's farm and Uncle Romeo's bakery. Now, one of the most fascinating stories she told was of the French-Canadian families bringing their bean pots to the bakery in the morning on Friday. Each family made up their own recipe and put the beans and bean liquor in the pot along with a "streak of fat/streak of lean" chunk of salt pork.
Mom told me that the coal-fired baking ovens were turned down after the days bread was baked but not all the way off because it would take too long to bring it back up for the next days baking. Since the oven was on a steady and low temperature all night, it was the perfect way to cook the beans, and since the oven was so large, there was room for every bean pot. In the morning when the bread went in the oven, the bean pots were moved to the top of the oven where they stayed warm and finished cooking until someone was sent to fetch them. This was the perfect Saturday night supper, along with a loaf of crusty bread from the bakery, or a steamed brown bread, and a ham steak if you were particularly lucky that week.
For a lot of reasons, I have always been a huge fan of baked beans, partly because of this great family memory, partly because of my early childhood visit to Durgin Park dining hall in Boston, where baked beans have been a staple on the menu for many generations. I also learned how to make baked beans from my first two cookbooks - Fannie Farmer Boston Cooking School Cookbook and the New England Cookbook by Eleanor Early. Both included legendary recipes for baked beans, and in my enthusiastic way, I began buying bean pots. I have owned many stoneware bean pots over the years, and I now have about 6 of them, most without covers. Every time I see a bean pot in the Goodwill Store, I have a compulsion to buy it - most sell for two or three dollars, usually because the cover is long gone. I top my bean pots with a pyrex dish that fits over the hole.
This brings me to my supper tonight. Last winter, I was on a bean baking spree and decided to pressure can the extra beans. I soaked and boiled about 6 lbs of beans and filled all 6 bean pots, 3 without meat and 3 with that great chunk of salt pork. Once they were baked over night, I set out to can them, and was able to put up about 20 pints of Boston Baked Beans. This to me, is like money in the bank. They make a great side dish for a quick week night supper, and who doesn't love Franks and Beans. I have also opened a few jars and put them back in the bean pot to heat and bring to a picnic. I know people swear by their "recipe" for baked beans that start with opening a can and then doctoring them up, but there is nothing quite like a pot of home made Boston Baked Beans.
Saturday, August 30, 2014
Sunday, August 3, 2014
Blueberry and Corn Pancakes

This weeks CSA included corn on the cob, blueberries, tomatoes, squash and a few other terrific items. I have been focused on main meals, particularly dinner, mostly because that is the time we sit down together and it is when I have the most time to plan. On Wednesday we had corn on the cob; last year I heard about a great way to shuck and cook corn all at the same time. The technique involves cutting the stem end off the cob so that the kernels are showing, then microwaving the ears for about 4 minutes each. Then, using an oven mitt or silicone pad, squeeze the ear of corn from the silk end until the ear pushes out of the husk. The ear comes out clean with almost no corn silk remaining. This technique works great, especially when you are only cooking one or two ears. The microwave is not nearly so efficient if you have to cook corn for a large group. Here is how I adapted this idea: cut the corn the same as you would for the microwave, but stack the corn stem side down in the strainer basket of a spaghetti pot. Put about 1 quart of water in the pan and steam the corn with the lid on. After about 14 minutes, shut off the heat under the pan and remove the strainer basket. Squeeze the ears from the top and out come perfectly cooked ears of corn with no silk. Because the corn and silk are wet, they do not fly all over the kitchen - no mess, no fuss.
When I cooked all ten ears of corn, my intent was to cut the corn off the cob and freeze what we didn't eat for dinner. That didn't happen, so when I got up the next morning, there were 6 ears of corn staring at me from a zip lock bag in the fridge. I was reminded of my Mom making corn pancakes using canned whole kernel corn. I decided to try and recapture my memories and make a batch of pancakes with corn. As I reached for the carton of milk, my I noticed the pint of blueberries from Gresczyk Farm - now I was on to something. The results were spectacular - the corn maintained its crunch even cooked in the pancakes, and the blueberries burst open and practically made a sauce on the top. To be extra indulgent, I heated some Vermont maple syrup in the microwave with a pat of butter. This was the best breakfast I have had in a long time.
Here's the recipe for the pancakes:
Blueberry Corn Pancakes
In a bowl sift the following dry ingredients:
2 cups all purpose flour
2 tbsp sugar
1 tsp baking powder
1/2 tsp baking soda
1 tsp salt
1/2 tsp cinnamon
In a large measuring cup, add the wet ingredients
1 1/2 cups buttermilk
2 beaten eggs
2 tbsp melted butter
Make a well in the dry ingredients. Pour the wet ingredients into the well all at once and stir gently until all flour is moistened, but some lumps remain. Fold in:
1 cup corn, cooked and cut off the cob (or use frozen corn)
1 cup blueberries
Do not overmix, as this will make your batter tough by forming gluten in the flour.
Cook on medium heat in a cast iron skillet, a non-stick frying pan or on an electric griddle. Lightly grease the pan before each pancake is cooked. Flip the pancake only once, when you see bubbles starting to form in the center of the pancake and the edges look like the batter is drying, then cook for an additional 1 to 2 minutes.


- Top with buttered maple syrup.
Thursday, July 24, 2014
It has been a few weeks since the CSA started - I know I committed to using what we received and sharing the results in this blog. I'm a little behind, so let me catch you up. Over the past three weeks, we have been preparing for a visit from our drum friends from Switzerland - about 120 of them. We had a great time as our local drum corps hosted a series of events, most of which included food. The goal was to prepare the best quality local ingredients we could get and provide healthy meals for a large group. Bring on the veggies.

The weekly share from the CSA included Russian kale and pac choi among other great items. Since we were feeding a crowd that included vegans, people with gluten allergies and a variety of other special dietary needs, we opted to keep it simple. I made a salad of dried cranberries, tarragon and shredded carrots. Using vegan mayonnaise didn't alter the taste any, but made it possible to put it on the buffet table without worrying about spoilage (no eggs), and made it available to every diner.
Here's the recipe for a normal sized crowd:
1/2 cup dried sweetened cranberries
1/4 cup fresh tarragon leaves (use 1 tsp dried tarragon if fresh is not available)
1 cup vegan mayonnaise (found in the health food section of your local supermarket)
1/4 cup lime juice
1/4 cup agave nectar
1 teaspoon kosher salt or sea salt
1/2 teaspoon course black pepper
1/4 teaspoon cayenne pepper or red pepper flakes
pinch of nutmeg

Now for what to do with extra Kale. I like kale - don't love it, but I know it is very good for me. So hiding it in other recipes is a good thing to do. We were feeding a crowd in Granby so I had to make something nutritious but also packed with flavor. At Fife and Drum Camp earlier in the week the cook at the Incarnation Center served a Thai Quinoa and Kale Salad. Very interesting. I set out to create my own take on this but to yield enough for 120 people. It was a big hit, but to spare you the math, I have scaled it down here.
Thai Quinoa and Kale Salad
This takes advantage of the benefits of quinoa, the super grain, but mixes in other gluten free grains as well. I buy the 3 Continent blend at Ocean State Job Lot, that includes white and red quinoa, wild rice and brown rice. I package makes a pretty good sized salad. Kale is especially good in these types of salads because it holds up to the acid from the vinegar without getting too wilty.
1 pouch (or 2 cups) Quinoa (or other favorite Quinoa blend)
1 head Kale
1 Shredded Carrot
1 Diced Red Onion
1/2 Cup Crystallized Ginger (diced)
1 Cup roasted Sunflower Seeds
1 Cup Fresh Thai Basil (or use fresh basil)
Dressing
1/2 cup Rice Wine Vinegar
2 Tbsp Asian Chile Paste (or to taste)
Juice of 1 Lime
1/4 cup Sesame Oil
1 Clove Garlic, minced
Salt and Pepper to Taste
Cook Quinoa per package directions - you will know when the quinoa is ready because the grains will swell but still be slightly crunchy. Mix the dressing ingredients in a bowl while the quinoa is cooking so that it is ready to add to the quinoa while it is warm (to soak up all those wonderful flavors). Chop the kale and toss with the grains. Add the carrots, red onion, sunflower seeds and ginger and stir gently. Toss the basil with the salad just before serving.

The weekly share from the CSA included Russian kale and pac choi among other great items. Since we were feeding a crowd that included vegans, people with gluten allergies and a variety of other special dietary needs, we opted to keep it simple. I made a salad of dried cranberries, tarragon and shredded carrots. Using vegan mayonnaise didn't alter the taste any, but made it possible to put it on the buffet table without worrying about spoilage (no eggs), and made it available to every diner.
Here's the recipe for a normal sized crowd:
Carrot and Craisin Salad
4 lbs carrots, peeled and shredded (or buy pre-shredded carrots if you like)1/2 cup dried sweetened cranberries
1/4 cup fresh tarragon leaves (use 1 tsp dried tarragon if fresh is not available)
1 cup vegan mayonnaise (found in the health food section of your local supermarket)
1/4 cup lime juice
1/4 cup agave nectar
1 teaspoon kosher salt or sea salt
1/2 teaspoon course black pepper
1/4 teaspoon cayenne pepper or red pepper flakes
pinch of nutmeg
Now for what to do with extra Kale. I like kale - don't love it, but I know it is very good for me. So hiding it in other recipes is a good thing to do. We were feeding a crowd in Granby so I had to make something nutritious but also packed with flavor. At Fife and Drum Camp earlier in the week the cook at the Incarnation Center served a Thai Quinoa and Kale Salad. Very interesting. I set out to create my own take on this but to yield enough for 120 people. It was a big hit, but to spare you the math, I have scaled it down here.
Thai Quinoa and Kale Salad
This takes advantage of the benefits of quinoa, the super grain, but mixes in other gluten free grains as well. I buy the 3 Continent blend at Ocean State Job Lot, that includes white and red quinoa, wild rice and brown rice. I package makes a pretty good sized salad. Kale is especially good in these types of salads because it holds up to the acid from the vinegar without getting too wilty.
1 pouch (or 2 cups) Quinoa (or other favorite Quinoa blend)
1 head Kale
1 Shredded Carrot
1 Diced Red Onion
1/2 Cup Crystallized Ginger (diced)
1 Cup roasted Sunflower Seeds
1 Cup Fresh Thai Basil (or use fresh basil)
Dressing
1/2 cup Rice Wine Vinegar
2 Tbsp Asian Chile Paste (or to taste)
Juice of 1 Lime
1/4 cup Sesame Oil
1 Clove Garlic, minced
Salt and Pepper to Taste
Cook Quinoa per package directions - you will know when the quinoa is ready because the grains will swell but still be slightly crunchy. Mix the dressing ingredients in a bowl while the quinoa is cooking so that it is ready to add to the quinoa while it is warm (to soak up all those wonderful flavors). Chop the kale and toss with the grains. Add the carrots, red onion, sunflower seeds and ginger and stir gently. Toss the basil with the salad just before serving.
Strawberry Jam
I have been making jam of many sorts for a long time, sometimes quite unsuccessfully. I can't tell you how many times I have woken up the next morning hoping the jam would be jammy and found instead ice-cream syrup. I tried recooking, I tried making pancake syrup with it, overall those were unsatisfactory experiences. Other times, things went quite well - the jam was thick and perfectly sweet. After all these years of trial and error, I set out to do as much research as possible to find out why jam works the way it does and the best way to make it.

First of all, I want to make a few observations. While I have jelly jars all over the house, I decided not to use them this year. Each jar only holds 8 ounces. If you are like me, and your son has just pulled a loaf of bread out of the oven, an 8 ounce jar of jam will be gone in two dips of the knife. I'm sticking with pint jars this year. And since the jars are bigger, that means the batch size is just not going to work. A typical recipe for jam makes about 8 jars or about 71/2 cups of jam. If doubling the size of the jar, that would yield only 4 jars of jam, and in my house, that would last until next Tuesday. I have heard the argument for small batch jam - it is easier to control, less likely to scorch, more likely to set. So the first problem is how to make a larger batch of jam that works.
.JPG)
The other thing to consider is pectin. In the great debate over jamming and canning, you will find those who refuse to use it - the jam purists. I don't mind using pectin; pectin is a naturalsubstance found in under ripe apples and other fruits, like quince, boysenberry, red currants and cranberries. Some wise old canners add a grated green apple to the pot of berries to give a pectin boost. Others actually make their own pectin, something I am interested in trying in the near future, mostly because liquid pectin is so expensive.
Since I am doubling the size of the batch, I need to know how much pectin to add. And while we are at it, if I'm throwing out the recipe, how much sugar? It all gets back to pectin - fruit naturally contains it, but some fruits have more than others. For example, high acid fruits like strawberries and peaches have lower levels of pectin, therefore are more likely to be thin unless you cook it past the point where it tastes good. It has to taste as close to fresh strawberries as possible.
Here is an old-timey secret I discovered in a Shaker cookbook- don't cook the fruit until the end. The trick is to cook sugar and a little bit of water until it boils and forms bubbles on the surface. Then poor it over your crushed berries in a non-reactive heat-safe bowl or pan. The berries steep in the hot syrup for 10 minutes, then strain off the juice and cook it again to the same thick consistency, Poor it over your berries and let it steep again for 10 minutes. Do this a third time. After 10 minutes of steeping, poor the syrup and the berries into the pan and cook until it starts to thicken. This is always a bit tricky, because everyone has different stoves and pans, and all fruit is not the same. This is where I veer off the Shaker method. I actually add pectin at this point, along with lemon juice to help the pectin work.Cook the jam to a temperature between 218 and 220 degrees.
The other way to tell is to use frozen spoons or dessert plates - put a small drop of jam on the chilled plate and if it forms a solid sheet it is ready. The easiest way to do this is to put a stack of dessert plates in the freezer before you start preparing the fruit. By the time you are ready to test, spoon a little onto a plate and see if it gels. If not, keep on cooking then test on the next plate.
If you blow on the jam and the jam skin wrinkles that is also a sign that it is ready. Add pectin and stir for just one minute - overcooking the jam with the pectin added prevents it from jelling.
As for jars, watch for them at tag sales, or buy them only when they are on sale at the supermarket or at a large department store. Sometimes you can buy them at Goodwill or Savers - just don't pay more for used jars than for new.
One other piece of advice - lemons were $.75 each at the store today. It would take about 8 lemons to make a large batch of jam like this, so I bought bottled lemon juice. Look for the kind that is not reconstituted. I have found no information on the web that tells that bottled lemon juice does not work in jam making. Some prefer the taste of fresh-squeezed, but the amounts are small enough that the jam is brightened by the bottled or fresh-squeezed juice.
My Recipe yields 9 pints of jam or 18 jelly jars
18 cups crushed strawberries with strawberry juice
18 cups sugar
1 1/2 cups lemon juice
4 pouches Ball liquid pectin
Put the berries in a large stainless steel bowl, glass pyrex or stoneware bowl and crush them with a potato masher. Measure berries and juice and use the same amount of sugar. Put sugar in a non-reactive stainless steel pot and add enough water to prevent the sugar from scorching as it comes to a boil (the amount does not have to be precise, because it will all evaporate as the sugar boils, but the more you add, the longer it will take to evaporate).
Cook the sugar syrup until it reaches the soft ball stage, or 235 F. Poor the sugar syrup over the fruit and let stand for 10 minutes, Please be careful when pouring the sugar - it is like molten lava. Strain off the sugar and berry juice and return to the pan and bring to a boil again, Cook to the soft ball stage and poor the juice and syrup over the berries. Let steep again for 10 minutes and strain off the juice and boil again. Cook to the softball stage. Put the fruit in the sugar syrup this time and cook again until it comes back to 235 degrees F. Add the lemon juice and cook for 5 minutes, removing any foam that comes to the top of the jam. (Adding a pat of butter to the jam as the berries cook also reduces the white foam but considerably adds to Weight Watchers Points Plus Values). Stir in the liquid pectin and boil for 1 more minute. Let the jam cool slightly for 10 minutes to prevent the berry solids from floating to the top of the jars. Using a canning funnel and ladle, fill each jar within 1/4 inch of the rim. Wipe the rims with a clean wet towel and put a sterile jar lid on the center of the jar and screw the band on until it is finger tight. Using jar tongs, place the jars into a water bath and boil for 10 minutes. Remove jars from boiling water bath and place on cooling rack, making sure jars are not touching. You can tell when the jar is sealed by the popping noise as the vacuum is created. If the domed center of the lid still moves up and down when you push on it, it is not sealed. Place that jar in the refrigerator and use first.
Note - when I first started canning, I had an old canning pot with a wire jar basket. Somewhere along the lines the basket got lost and when I tried to can, at least one jar would break in the boiling water. Not a nice experience, especially when you have to fish in to a pot with broken glass. Plus, whatever I was canning made all the other jars dirty and perhaps contaminated. Not cool. I learned that you have to have something on the bottom of the pot to prevent the jars from breaking. You could use an upside down cake pan, a cake cooling rack, or even folded kitchen towel. This prevents the jars from rattling along the bottom of the pot and breaking while under water.
First of all, I want to make a few observations. While I have jelly jars all over the house, I decided not to use them this year. Each jar only holds 8 ounces. If you are like me, and your son has just pulled a loaf of bread out of the oven, an 8 ounce jar of jam will be gone in two dips of the knife. I'm sticking with pint jars this year. And since the jars are bigger, that means the batch size is just not going to work. A typical recipe for jam makes about 8 jars or about 71/2 cups of jam. If doubling the size of the jar, that would yield only 4 jars of jam, and in my house, that would last until next Tuesday. I have heard the argument for small batch jam - it is easier to control, less likely to scorch, more likely to set. So the first problem is how to make a larger batch of jam that works.
The other thing to consider is pectin. In the great debate over jamming and canning, you will find those who refuse to use it - the jam purists. I don't mind using pectin; pectin is a naturalsubstance found in under ripe apples and other fruits, like quince, boysenberry, red currants and cranberries. Some wise old canners add a grated green apple to the pot of berries to give a pectin boost. Others actually make their own pectin, something I am interested in trying in the near future, mostly because liquid pectin is so expensive.
Since I am doubling the size of the batch, I need to know how much pectin to add. And while we are at it, if I'm throwing out the recipe, how much sugar? It all gets back to pectin - fruit naturally contains it, but some fruits have more than others. For example, high acid fruits like strawberries and peaches have lower levels of pectin, therefore are more likely to be thin unless you cook it past the point where it tastes good. It has to taste as close to fresh strawberries as possible.
Here is an old-timey secret I discovered in a Shaker cookbook- don't cook the fruit until the end. The trick is to cook sugar and a little bit of water until it boils and forms bubbles on the surface. Then poor it over your crushed berries in a non-reactive heat-safe bowl or pan. The berries steep in the hot syrup for 10 minutes, then strain off the juice and cook it again to the same thick consistency, Poor it over your berries and let it steep again for 10 minutes. Do this a third time. After 10 minutes of steeping, poor the syrup and the berries into the pan and cook until it starts to thicken. This is always a bit tricky, because everyone has different stoves and pans, and all fruit is not the same. This is where I veer off the Shaker method. I actually add pectin at this point, along with lemon juice to help the pectin work.Cook the jam to a temperature between 218 and 220 degrees.
The other way to tell is to use frozen spoons or dessert plates - put a small drop of jam on the chilled plate and if it forms a solid sheet it is ready. The easiest way to do this is to put a stack of dessert plates in the freezer before you start preparing the fruit. By the time you are ready to test, spoon a little onto a plate and see if it gels. If not, keep on cooking then test on the next plate.
If you blow on the jam and the jam skin wrinkles that is also a sign that it is ready. Add pectin and stir for just one minute - overcooking the jam with the pectin added prevents it from jelling.
As for jars, watch for them at tag sales, or buy them only when they are on sale at the supermarket or at a large department store. Sometimes you can buy them at Goodwill or Savers - just don't pay more for used jars than for new.
One other piece of advice - lemons were $.75 each at the store today. It would take about 8 lemons to make a large batch of jam like this, so I bought bottled lemon juice. Look for the kind that is not reconstituted. I have found no information on the web that tells that bottled lemon juice does not work in jam making. Some prefer the taste of fresh-squeezed, but the amounts are small enough that the jam is brightened by the bottled or fresh-squeezed juice.
My Recipe yields 9 pints of jam or 18 jelly jars
18 cups crushed strawberries with strawberry juice
18 cups sugar
1 1/2 cups lemon juice
4 pouches Ball liquid pectin
Put the berries in a large stainless steel bowl, glass pyrex or stoneware bowl and crush them with a potato masher. Measure berries and juice and use the same amount of sugar. Put sugar in a non-reactive stainless steel pot and add enough water to prevent the sugar from scorching as it comes to a boil (the amount does not have to be precise, because it will all evaporate as the sugar boils, but the more you add, the longer it will take to evaporate).
Cook the sugar syrup until it reaches the soft ball stage, or 235 F. Poor the sugar syrup over the fruit and let stand for 10 minutes, Please be careful when pouring the sugar - it is like molten lava. Strain off the sugar and berry juice and return to the pan and bring to a boil again, Cook to the soft ball stage and poor the juice and syrup over the berries. Let steep again for 10 minutes and strain off the juice and boil again. Cook to the softball stage. Put the fruit in the sugar syrup this time and cook again until it comes back to 235 degrees F. Add the lemon juice and cook for 5 minutes, removing any foam that comes to the top of the jam. (Adding a pat of butter to the jam as the berries cook also reduces the white foam but considerably adds to Weight Watchers Points Plus Values). Stir in the liquid pectin and boil for 1 more minute. Let the jam cool slightly for 10 minutes to prevent the berry solids from floating to the top of the jars. Using a canning funnel and ladle, fill each jar within 1/4 inch of the rim. Wipe the rims with a clean wet towel and put a sterile jar lid on the center of the jar and screw the band on until it is finger tight. Using jar tongs, place the jars into a water bath and boil for 10 minutes. Remove jars from boiling water bath and place on cooling rack, making sure jars are not touching. You can tell when the jar is sealed by the popping noise as the vacuum is created. If the domed center of the lid still moves up and down when you push on it, it is not sealed. Place that jar in the refrigerator and use first.
Note - when I first started canning, I had an old canning pot with a wire jar basket. Somewhere along the lines the basket got lost and when I tried to can, at least one jar would break in the boiling water. Not a nice experience, especially when you have to fish in to a pot with broken glass. Plus, whatever I was canning made all the other jars dirty and perhaps contaminated. Not cool. I learned that you have to have something on the bottom of the pot to prevent the jars from breaking. You could use an upside down cake pan, a cake cooling rack, or even folded kitchen towel. This prevents the jars from rattling along the bottom of the pot and breaking while under water.
Thursday, June 26, 2014
June 26, 2014
Two new recipes today. The CSA share yesterday included green bunching onions with about 2 feet of beautiful onions greens, looking like scallions on steroids. I wanted to make something cool with them as it is very hot today, so I made vichyssoise. The difference between the classic and my version, is that the original only used the white part of the leek - since I was using mainly green onion, the color and texture would be quite different. Here's how I made it:
Green Onion Vichyssoise
Heat a sauce pan over medium high heat, and add two teaspoons of olive oil. Saute 4 cups sliced green onions until they wilt. Add 1/2 cup chicken stock and simmer until they are tender. Add 1 1/2 more cups chicken stock and throw in 4 cups diced white potatoes. Add 1 tsp of kosher salt and simmer until potatoes are cooked. Remove from stove and cool for 15 minutes. Blend of puree in food processor (I used my immersion blender) until creamy. Reseason with salt and pepper. Classic recipe calls for white pepper, but since I used so large a quantity of green onion, the pretty color of the soup wasn't overwhelmed by the coarsely ground black pepper. Chill in the fridge overnight and serve cold with a dollop of lite sour cream and some fresh tarragon leaves or other herbs. Yumm. Note - this is Weight Watcher Friendly because it contains no heavy cream as is customary. The small amount of lite sour cream could be eliminated and the soup would be just as good.
Dinner - Kale and Chorizo Stew
I wanted to make something a little spicy that would stand up to the hearty kale. Kale is a very hip vegetable these days, mostly because it is packed with nutrients and minerals, and it is also sturdy enough to hold up to braising, or salad with vinaigrette.
Here's how I made it:
Heat frying pan over medium high heat. Add sliced Chorizo Sausage ( I used about 6 ounces for 3 people).
Render the fat from the sausage and remove from the pan when it is browned on both sides. Add 1 chopped onion and saute until translucent. Add 2 cups chicken stock and 10 cups chopped kale. Lower heat and simmer gently until the kale is a bright vibrant green, yet still slightly crunchy. Add 1 can of white beans and 6 ounces of sliced chicken or roasted turkey breast ( I used leftover turkey cutlets from last nights salad). Season with salt and pepper and hot pepper flakes, smoked paprika and celery seed to taste. Serve with good crusty bread ( a Peter Mason specialty)

Next up - Sugar Snap Peas - I'm thinking a stir fry with Thai Basil.
Two new recipes today. The CSA share yesterday included green bunching onions with about 2 feet of beautiful onions greens, looking like scallions on steroids. I wanted to make something cool with them as it is very hot today, so I made vichyssoise. The difference between the classic and my version, is that the original only used the white part of the leek - since I was using mainly green onion, the color and texture would be quite different. Here's how I made it:
Green Onion Vichyssoise
Heat a sauce pan over medium high heat, and add two teaspoons of olive oil. Saute 4 cups sliced green onions until they wilt. Add 1/2 cup chicken stock and simmer until they are tender. Add 1 1/2 more cups chicken stock and throw in 4 cups diced white potatoes. Add 1 tsp of kosher salt and simmer until potatoes are cooked. Remove from stove and cool for 15 minutes. Blend of puree in food processor (I used my immersion blender) until creamy. Reseason with salt and pepper. Classic recipe calls for white pepper, but since I used so large a quantity of green onion, the pretty color of the soup wasn't overwhelmed by the coarsely ground black pepper. Chill in the fridge overnight and serve cold with a dollop of lite sour cream and some fresh tarragon leaves or other herbs. Yumm. Note - this is Weight Watcher Friendly because it contains no heavy cream as is customary. The small amount of lite sour cream could be eliminated and the soup would be just as good.
 |
| Vichyssoise - Potato and Green Onion Soup |
Dinner - Kale and Chorizo Stew
I wanted to make something a little spicy that would stand up to the hearty kale. Kale is a very hip vegetable these days, mostly because it is packed with nutrients and minerals, and it is also sturdy enough to hold up to braising, or salad with vinaigrette.
Here's how I made it:
Heat frying pan over medium high heat. Add sliced Chorizo Sausage ( I used about 6 ounces for 3 people).
Render the fat from the sausage and remove from the pan when it is browned on both sides. Add 1 chopped onion and saute until translucent. Add 2 cups chicken stock and 10 cups chopped kale. Lower heat and simmer gently until the kale is a bright vibrant green, yet still slightly crunchy. Add 1 can of white beans and 6 ounces of sliced chicken or roasted turkey breast ( I used leftover turkey cutlets from last nights salad). Season with salt and pepper and hot pepper flakes, smoked paprika and celery seed to taste. Serve with good crusty bread ( a Peter Mason specialty)
Next up - Sugar Snap Peas - I'm thinking a stir fry with Thai Basil.
June 25, 2014
Not too creative for dinner tonight, but delicious anyway. Chef salad, with turkey cultets, fresh mozzarella, sourdough croutons, tomatoes from my garden and balsamic/lemon vinaigrette. For dessert, strawberries and ice cream. The strawberries were so sweet and juicy, they needed no extra sugar and reminded me of the annual joy that comes only with berry picking season. Nothing else like it! Lettuce and onions in the salad were from Greczyk Farm
Not too creative for dinner tonight, but delicious anyway. Chef salad, with turkey cultets, fresh mozzarella, sourdough croutons, tomatoes from my garden and balsamic/lemon vinaigrette. For dessert, strawberries and ice cream. The strawberries were so sweet and juicy, they needed no extra sugar and reminded me of the annual joy that comes only with berry picking season. Nothing else like it! Lettuce and onions in the salad were from Greczyk Farm
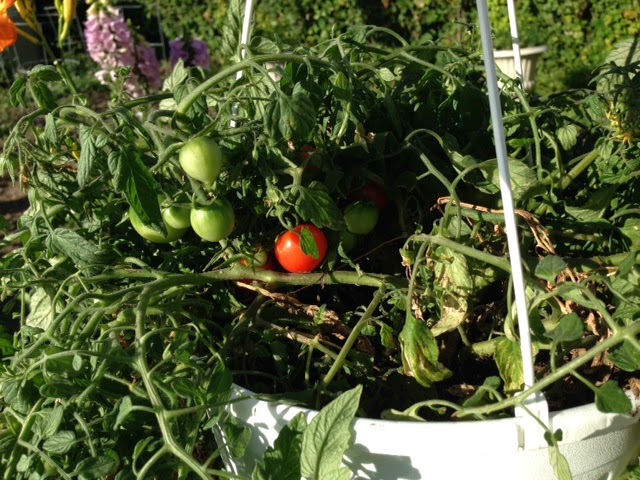 |
| Cherry Tomatoes from my Garden Strawberries were grown in East Windsor at Dzen Farms. |
My First CSA Share
Last year Pat and I went to the local farmer's market in Bristol, CT. We were browsing around, but a line of people at one particular booth caught my eye - they were loading their car with bags of fresh produce, already selected for them. I asked the farmer about it and he explained the concept of a CSA, or community supported agriculture. I knew very little about the process, but started to look into it on the web, and was very intrigued. We saved up all winter and in early April, when the idea of freshly picked peas, lettuce and tomatoes was becoming too much to ignore, we drove to the farm and signed up.
I vowed to use or preserve everything the farmer provided, even if it meant learning to cook and eat things I had never seen before (also things I have had an aversion to for years, like beets).
Yesterday we picked up our first share, which included strawberries, two varieties of kale, two heads of hydroponic lettuce, garlic scapes, green bunching onions, sugar snap peas and a dozen eggs straight from the coop. Part of the joy and challenge for me will be to come up with new and interesting ways to cook these wonderful veggies. As I create recipes (or at least adapt what other people have already made) I will try to share them with you and pass along my food musings.
Subscribe to:
Posts (Atom)